Tuesday, November 20, 2007

A Closet Makeover

With the changing seasons (and especially after the holidays) you may be spending more time than usual standing in front of your closet trying to figure out how to make it all fit. At one time my sister, Tiffany, felt the same way. Then we got her clothes organized by using some great shelving and some space saving configurations.

The Problem:
  • Tiff loves jeans and sweaters (and clothes in general!) but that wasn't her biggest problem. The main problem was the way she was storing them. She had lots of sweaters that were difficult for her to get to because they were piled sky high on the top shelf and she's not super tall. Her jeans were impossible to get to because they were folded over each other on pants hangers with multiple rods. As you can see above, the floor space was underutilized as it was just a dumping ground for shoes and boots. She also had shoes in an over the door organizer (not shown) that rounded out her collection. The hangers were so tight she could barely squeeze anything in when it came time to hang things. Basically, getting dressed was not only a physical workout but an exercise in patience for Tiffany.
BEFORE
The Sort & Purge:
  • First, we pulled all the clothes out and sorted them into categories ("like with like"). Then Tiff went through each item and purged anything that she did not wear, that was not flattering and that did not fit. I was so proud of all the clothes that she bagged up to donate. She has good taste in clothes and they were still in great shape so someone was going to love them!
Assigning Homes:
  • Second, we decided what items from her closet would remain in her closet and what types of clothes would store better in her dresser drawers. This gave us more space in her closet to have some breathing room and make things more accessible.
Preparation and Planning:
  • Next, we measured her closet and counted how many pairs of jeans and pairs of shoes she had so we could buy the appropriate organizers. Then we went shopping! We decided to go with some Closet Maid shelving from the local Kmart (also found at Lowes (see link) and Target). Since we had our measurements and numbers in hand, in less than an hour we had what we needed to go home and finish the job.
The Solution:
  • Last, we put all her jeans in a vertical shelving unit placed in the middle of the closet where it could be accessed easily. I thought of it as a "Jean Tower." We then configured the shoe shelves in the best way to make use of the floor space. We stacked them right up under the short hanging items and left space in the far right area of the closet for her few long hanging items. Stacking the sweaters on the top shelf was much easier this time around because we had fewer of them to stack. If we had wanted to go the extra mile we could have bought shelf dividers (can also be found at The Container Store ) for the top shelves to keep the stacks in order. We also used a belt hanger for all her belts to hang on individual hooks which was much better than the one she was using before.

AFTER

Isn't it beautiful?! The best part of this closet system was that two months later my sister moved our of her apartment and into her first home. She was able to take everything with her and set up her new closet in almost the exact same way!
  • I'd love to hear your closet makeover stories. You can even email me some before and after pictures and I'll post them.

Friday, November 16, 2007

To Purge or Not to Purge...


When evaluating items ask yourself the following questions. Even better--invite a friend over to do the asking!

1. Do I like it?
2. Do I use it?
3. Do I need it?
4. Do I want it?
5. Do I have room for it?
6. If I didn’t have it, would I think I needed it?
7. What is the worst thing that could happen if I got rid of this?

Honestly use these as guidelines and you'll be on your way to a more clutter-free life!

Thursday, October 25, 2007

Turn a Stack of Photos Into a Book!


I happened upon a company today that makes books out of your digital or physical photos. You send them a stack of same size photos and they bind them into a cool little book and mail it back to you. As far as I can tell, it looks like it costs $30 and up. This is a really neat gift idea and would also be a great thing to do with collections of special photos that haven't yet made their way into albums.

Go to Togetherbook.com and check it out if your photos are begging for some attention.

Wednesday, October 24, 2007

"Pretty" File Folder Labels-Easy as 1, 2, 3!


Do you ever feel like giving up on your filing system looking "pretty"? Have you ever decided to "Just Do It" and make computer generated labels only to discover that it's impossible to keep it up as you add new files. It just takes too much time. There are too many steps involved to do it quickly. Why bother?

I asked myself all those questions many times before I came up with a solution. I used to get so frustrated with trying to keep my files looking good that I would just use my handy dandy pencil to make a new folder and tell myself, "Who cares if they're pretty, anyway!" I would get around to making a new pretty label later (much, much later, if ever!).

As much as I told myself it didn't matter, I soon discovered that I cared if they were pretty! I found that I wanted the uniformity and more importantly, I wanted my files to be easy to read so I could find what I was looking for faster. After years of this, I finally realized that in order to keep the files "pretty" I had to do something to make it easy to print new labels as soon as I made a new folder. Here's how to make uniform, pretty labels in 3 easy steps:

1. Buy file folder labels from any office supply store and follow the directions to create a template for your labels on Microsoft Word. I use white Laser/Ink Jet Filing Labels Avery 8366 but you could use colored labels or removable if you want to get fancy. If you are not very "computer literate" don't worry! This is much easier than you think it's going to be so stick with me. Once you've opened Microsoft Word go to Tools, Letters and Mailings, Envelopes and Labels. Click on Options. From the list choose product number 8366-File Folder (or the number that matches your labels). Now click Okay. You should be back to the Labels window. Just make sure Full Page of the Same Label is selected and click New Document. Now you can choose your favorite font and type in all your file names. Print and apply your labels.

2. Create a shortcut file to your desktop so you can print new file labels with ease! Now you want to save this document on your desktop. You do this by going to File then Save As. Here you want to choose Desktop from the Save in: menu to the left of the Save As window. (It sounds more complicated than it is, trust me!) Type the name of your document in the File Name box. Call it "File Folder Labels" and click Save.

3. Keep a few sheets of labels in a folder labeled "LABELS" :) and keep it near your computer/printer. From now on when it's time to make a new label all you have to do is pull a sheet of labels out of your "LABELS" folder, open the "File Folder Labels" document on your desktop and make changes to the template. The key here is to clear the old file folder labels you've already printed and start fresh each time you make new labels. Don't try to save each new change (I've tried that and it's too confusing!). Just type the new file labels on your cleared template, print the new ones and be done with it! If you really want to save your file labels save them in another place/folder on your computer and not on the desktop template that you made.

Once you do it a few times you might actually start to think of labeling files as "fun"...or maybe that's just me again! Good luck and let me know how it goes or if you have any other great filing tips!

Wednesday, October 10, 2007

Words to live by

The Zen of Clean

Clutter-free living begins with an attitude of respect. Every item you possess
has its own function, whether practical or sentimental, so it’s important that
each has its proper space. Keep only the most useful and meaningful things —
it’s distracting when every surface is covered with objects. Prioritize what you
really need, then think about each object’s purpose and respectfully honor its
place in your home.

Kate Henninger

Katy, Texas

Looking for some inspiration?

There are always great organizing articles at Real Simple.com. It's one of my favorite places to go for inspiration and ideas.

Tuesday, October 9, 2007

What's Your Motivation?

How do you get from here...

...to here?

By writing down your goals, that's how!

What's the first thing you think of when you wake up in the morning? If you're anything like me you might be thinking, "I'd like a few more minutes of sleep before I start thinking, thank you very much!" By the time the bed is made, the prayers are said, the shower is taken, the make-up is on, the kitties are fed, breakfast is eaten, the dishes are done, the laundry is in...need I say more? In a matter of 30 minutes I've become so focused on what needs to be done today and all my to do's that I forget about why I am doing it all in the first place.

Recently I was reminded about the power of setting goals and the impact they have on our lives, even when we don't see it right away. The reality is, we all have goals whether we speak them aloud or not. But how often do we take the time write them down, flesh them out and make them real, measurable and attainable?

A few months ago I felt inspired to put my mental/unspoken goals into words and write a few of them down. I wrote down my 1-year career and business goals and my 1-year personal and family goals and then my 5-year career and business goals and my 5-year personal and family goals. I also cut some pictures out of a magazine to go along with those goals to help me visualize them better. As a part of this project I found and framed my favorite quote that symbolizes what I call "my motivation". It hangs above my desk so I can read it often. It has been so inspiring!

And what's even more notable is that in just a short few months I have already seen ways that I have moved toward achieving my goals. Most of the time I don't even realize that's what I'm doing until later. Articulating and writing down my goals also makes me look forward to finding ways to achieve those goals during the day when otherwise I would just be caught up in the who, what, when, and where of my life, forgetting all about the why.

So what does all this have to do with organizing you might ask? Well, a whole lot if you ask me (which I'm pretending you did!). If we can focus a little more on the why aspect of life we begin to live with more purpose. We make better decisions about our time and the things that fill our time and that, my friends, has a lot to do with organizing--the decisions we make with our time are an important part of living a balanced, happy life.

So ask yourself, "What's my motivation?" and then take a few minutes to write down some long term goals today. Put the pen to the paper and don't be afraid of writing down those "big dreams." Seeing those come true is the best part! Then, put your mind and your energy to achieving those worthwhile goals. Let the things that aren't truly important slip away and start living with direction and purpose! You will thank yourself later for it and so will your family and friends! :)


P.S. As a result of Googling for a good picture for this post I ran across some great links that expound on goal setting. Check out Goal Setting: The 90-Day Challenge and Cultivate Greatness. Both have great information on them. Happy goal setting--I'd love to hear what you have to say on this topic!

Friday, August 24, 2007

Internet Journal

A few months ago a friend of mine showed me her neat (and super cute, I might add) new find called the Internet Journal where she can keep track of all of her favorite Internet sites. She found hers at a local store and when she went back to find me one they were all gone! I wondered if I would ever see one in the stores--it seemed like a long shot. Imagine my surprise when I opened up my second issue of Organize magazine yesterday (I LOVE this magazine!!!) and found the very same Internet Journal in the "Neat Things We Like" section. It's only $8.95 (not bad, huh?) at Paperstyle.com. I couldn't find a picture of the inside on this site but there's one in Organize magazine (pg. 18). The pages are alphabetically organized and have places to write the website, description, username, password, and notes. Just remember to keep it stored in a safe place if you use it for anything other than shopping. Happy shopping!

Thursday, August 23, 2007

Let's Broach the Subject of Jewelry


My grandmother is well known for her enthusiasm/love of jewelry (which I've noticed is beginning to rub off on my mother...I wonder if it's hereditary?). She has more jewelry than anyone I know. I'm convinced she has jewelry to match every outfit in her closet which is not easy since I don't think I've ever seen Grandma wear the same outfit twice. I can't think of a time when I have not seen Grandma's wrist adorned with multiple bangle bracelets, beautiful earrings and a necklace that coordinates perfectly. And let's not forget her rings! Grandma has an awesome ring collection. With all that jewelry I found myself wondering how on earth she finds all the parts to those jewelry ensembles and is still the first one up in the morning. So a few years ago after my grad parents finished a new master bedroom/bathroom additions that could accommodate Grandma's collection I took a peek and found that she she uses multi-drawer cabinets for most of it and she hangs her necklaces from hooks (lots of them) on the wall. But if you're anything like me, you don't have all that much jewelry to keep track of but you're tired of hanging your necklaces on thumbtacks next to the bathroom sink. Been there, done that! :)

Personally, I look forward to the day when I can afford to have a jewelry collection like grandma's and a wardrobe to go with it, but in the meantime, a well designed jewelry box and simple necklace hangers do the trick for me. Depending on where you want to store your jewelry (in a drawer, on a counter or dresser top) there are lots of ways you can do it. These are some of my favorite jewelry solutions:

If you store your jewelry in a drawer these stacking jewelry trays are great. They make one for necklaces, one for bracelets and watches and one with individual compartments for earrings, rings, and pendants. Lot of options, here. They have thin plastic dust covers to keep your jewelry dust free, too (nice).

If you like to have your jewelry out on your dresser you may opt for something more decorative. I love my stackable 3-level jewelry box. I bought mine at an Organized Living store years ago before they went out of business. (I found out later that they were a copycat Container Store which explains why I liked it so much!)

In this picture you can see how I've used the 3 levels. The far left I used for earring, rings and pendants organized by type (studs, dangly, gold rings, silver rings, the rings grandma gave me that are too fancy for anything other than weddings and funerals etc.) In the 2 compartment level I have my bracelets (beaded in one half, gold & silver in the other). In the bottom open compartment I store my watches. The little ceramic bowl you see hold my "daily" jewelry that I pretty much wear every day (favorite watch and rings).

This option is a similar product from The Container Store but without the lid.

For necklaces I really like this one (see picture below) for my delicate chains. But I recently saw this new one at the Container Store that I think is pretty. My sister-in-law uses a similar style holder and it looks really nice.


For my beaded necklaces, and pearls I really like my peg-board style acrylic organizer (also from The Container Store, although I didn't see it online today). I chose to hang this one next to my full-length mirror because these are the kinds of necklaces that I like to see with my entire outfit before I walk out the door. (That's just me, I'm sure!)


Now for one of my favorite jewelry suggestions--I like to use a double sided pill box for my jewelry when I travel. It's hard on the outside which protects the jewelry from getting squashed. It's compact and holds quite a bit in it's different size snap-closed compartments. You have to try it! And for those of you who subscribe to Real Simple there's an article with more jewelry organizing ideas starting on page 253 of the September issue and some inexpensive container ideas on the website. I would love to hear how you organize your jewelry!

Friday, July 6, 2007

Garage & Shed Tips Part 2


Last week I worked on a garage/work shop and thought I'd share some really useful tips.


  1. ASK: If the garage or shed is your husband's work space or the only place in the house he considers "his" you might want to ask permission to mess with his stuff before you dive in. (A friend of mine recently learned that her idea of a favor and her husbands idea of a favor differed when it came to organizing the garage--oops!)


  2. PLAN: Have a general plan for the space before you start moving things around. Decide where you want to set up various zones. Consider proximity to doors, open wall space, and where you already have shelves, racks, and storage space. Your zones might include: Gardening/Lawn Care, Tools & Parts, Sporting Equipment, Household Repairs, Summer/Beach Gear, etc.


  3. PREP: Get your garbage bags, brooms and dust pan ready. Your going to need them. Enlist the help of your children if they are old enough and get a notebook ready to write down things you might need to buy to finish the job.


  4. CLEAR A SPACE:Open your garage door, move your car if you need to and use your driveway to sort the items you pull out. Who cares what the neighbors think, they'll be jealous when you're done!


  5. PURGE: Get rid of anything really old, broken beyond repair, things you've never seen before in your life or that you know you will never use again. You might want to make a pile of the "unknown use" items until you are done. A friend and I almost threw away an attachment to her mini-vac because we didn't know what it went to until we found the mini-vac 20 min. later. Make a trash pile for your family members to go through later if you are uncomfortable throwing something away that isn't yours.


  6. FIND "HOMES"/HANG/CONTAINERIZE: Put things away in their "zones". Use storage containers (with wheels) and drawer systems for loose items like tape sand paper, gardening supplies, etc. Hang as much as you can! Use bike hooks to hang bikes and get them off the floor. Use tool racks like this (if you have floor space to spare) or hang rakes and other long handled tools from something like this. Use peg boards for hand tools. Use rolling drawers or drawer chests or boxes for small parts or items and label the drawers (even if they are see through). For sports equipment and balls use something like this. Check out these links to Stacks and Stacks , Target or Home Depot where you will find more great ideas for organizing all your zones. If you are looking to save money, use empty buckets and boxes you already have for storing items. It is, after all, just the garage! :)


  7. ENJOY! Step back, take a long look and enjoy having a place to put all your "stuff". Once you've done that you can gather up all your summer/beach gear and head to the beach. Just make sure you put everything away when you get back!

If you are still looking for more guidance here's a book I would recommend.

Projects

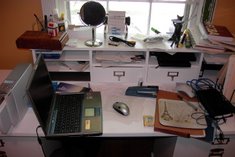
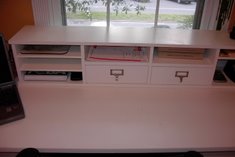
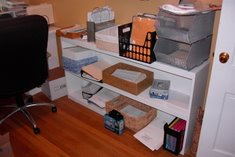
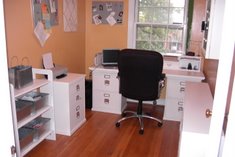
Take a look at some of my organizing success! (Photos and text used with permission.)

Before

Before
Cluttered Desk

After

After
Clean and Clear of Clutter

Chaotic Shelf

Neat and Tidy Home Office

Client Feedback

I work out of a home office without any administrative support. I worked with Melissa to organize both my personal and professional effects as I prepared to relocate. I wish I had done it years ago. While organizing my office and paperwork Melissa identified my natural tendencies and created an organizational structure that was easy for me to maintain. When I began looking for a personal organizer, I mostly wanted someone else to come in and take care of the mess I had allowed to build up over the years. Working with an “uninterested” party during the purging process helped me lighten my load considerably. During the process Melissa provided me with simple intuitive skills that have not only allowed me to maintain my newly found order but help friends and family organize as well. I can honestly say hiring Melissa is one of the best things I have ever done for myself. Kelsi Reeves